
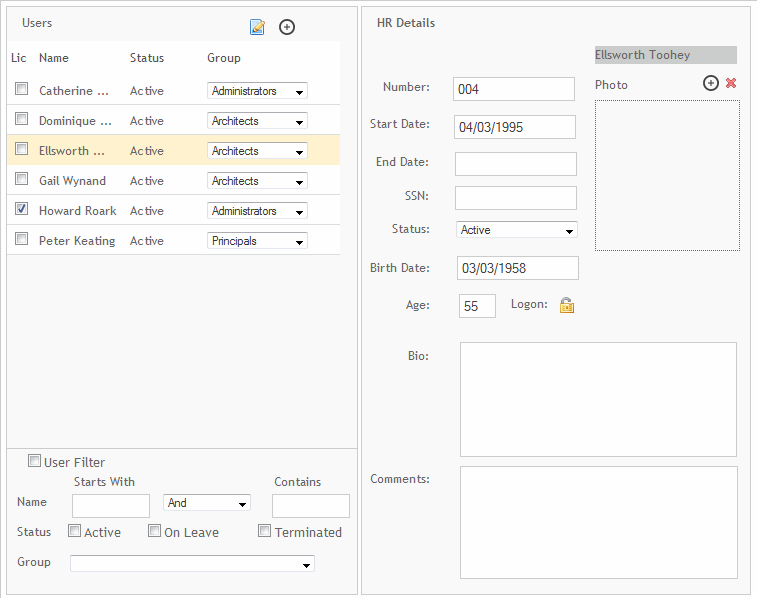
The Users - HR preferences are used to enter human resource related detail for users. You can enter information such as an employee ID number, employee start and end date and working status. In addition, a photo and short biography can be added.
Users
Go to Contact Record ![]() :
:
Click ![]() to
go to the contact record for the selected user.
to
go to the contact record for the selected user.
Add New User ![]() :
:
Click ![]() to add a new user account. You will be prompted to enter the person's
user name, login name, password, and initials. The administrator will
then be able to enter user account details for this new user.
to add a new user account. You will be prompted to enter the person's
user name, login name, password, and initials. The administrator will
then be able to enter user account details for this new user.
Lic:
Select this check box to assign a license to the selected user.
Name
This column displays the user names.
Status
This column displays a user's status (for example, active, on leave, or terminated).
Group
Select a work group from this drop-down list to which you would like to assign a selected user. The user will inherit all the privileges of that work group.
Delete ![]() :
:
Click ![]() to
delete a user.
to
delete a user.
User Filter
The User Filter options provide a convenient method to limit quickly what users are being displayed in the Users list.
Name:
Use these options to search for users based on parts of their names.
Status:
Select one or more of these check boxes to filter the list by a user's status (that is, active, on leave and terminated).
Group:
Make a selection from this drop-down list to filter users by work group.
HR Details
Number:
Enter the user's employee number. If this field is left blank, a number will automatically be assigned.
Start Date:
Enter the user's hire date.
End Date:
Enter the user's termination date.
SSN:
Enter the social security number of the user.
Status:
Select the user's current work status from this drop-down list (that is, Active, On Leave Or Terminated).
 All the associated projects are marked inactive when you mark an employee's
status as Terminated. You can make an employee and its associated
projects active again at any time.
All the associated projects are marked inactive when you mark an employee's
status as Terminated. You can make an employee and its associated
projects active again at any time.
Birth Date:
Enter the birth date of the user. Select the birthdate from the pop up calendar.
Age:
Display user's age in years. Click the field label to get the age of the user in days.
Logon ![]() :
:
Click ![]() to view or edit a user's logon details.
You can edit a user's logon, password, the initials displayed on reports,
and assigned work group.
to view or edit a user's logon details.
You can edit a user's logon, password, the initials displayed on reports,
and assigned work group.
Photo:
Click Add ![]() to include a photo of the user. The optimum size of the photo must be
165 x 180. Click
to include a photo of the user. The optimum size of the photo must be
165 x 180. Click  to delete it.
Bio:
Enter a biography of an employee.
Comments:
Enter additional comments about the user.
Do not enter sensitive information in this field (for example, work
performance, reviews, etc.). Any user who has access to preferences
can access these comments.
Button Panel
Save:
Stores your settings.
Help:
Opens the ArchiOffice Help in the Preferences section.