
Project managers, administrators and other users can use the Time/Expense tab to view time and expense data entered for their projects.
Type:
Choose whether you want to filter the list of time and expenses by Time or Expense.
Time/Expense Slips Require Approval:
Select this check box to turn on/off the optional workflow process requiring all time and expenses to be reviewed and approved before they can be billed.
Action
New:
Select this option to add a new time or expense entry to the project.
List:
Select to look at all the current project's time and expense entries in the List View. With the list view, you can batch update a found set of entries.
Find:
Select this option to locate a particular time or expense and return a found set displaying the results in a List View.
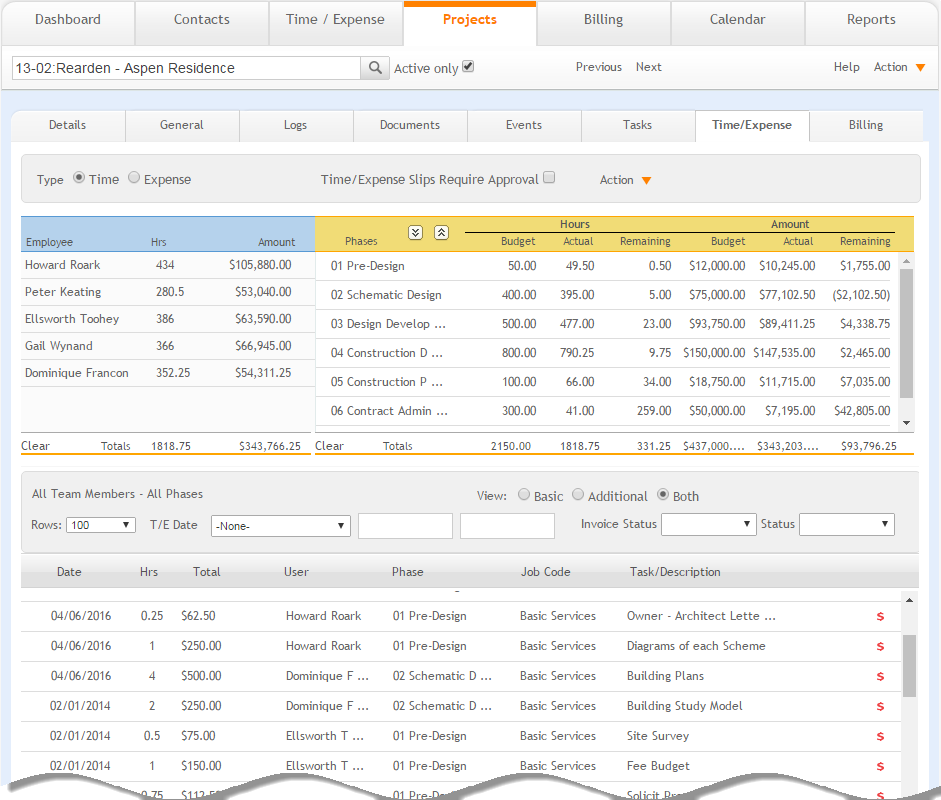
Employee:
This grid lists the total invoiced hours and time and expenses entered by employees working on a project. Select an employee in this list to display only entries entered for that employee in the Time/Expense screen. Click Clear to remove the Employee filter from the Slips portal. The employees appear in the same order here as they are set in the Projects-Details-Project Team screen. Also, the employees having no time and expense entries for a project are not displayed in the grid.
Phases:
This grid lists a project's phases and sub-phases. It displays the budgeted, actual, and remaining hours and amounts for each phase for the invoiced time and expenses. Select a phase to display details for time and expenses specifically entered for it in the Time/Expense screen. Click Clear to remove the Phases filter form the Slips portal.
 Click
the arrows adjacent to the listed phases to display or hide their
sub-phases.
Click
the arrows adjacent to the listed phases to display or hide their
sub-phases.
Some values (numbers) are truncated with . . . if they have more than
two decimal places due to character limitation. You can hover your
mouse over it to view the entire value.
All Team Members
This portal displays all the time and expenses entered by project team members. It includes invoiced and non-invoiced hours and amounts; therefore, the portal totals will not always match the totals in the Employee and Phase grids.
In addition to filtering data displayed on the time and expense portal by employee or phase, you can filter the portal to view time and expenses for a specific date range, type, or invoice status. Any combination of filters can be used. You must refresh the screen to view the relevant data.
The grid also displays the task or description associated with the time or expense entries. If the time and expense entry has a task, then it shows the task in the Task/Description column. If it has no task, it then displays the description.
Filter
Use the portal filters to view time and expenses for a specific date range, type, or invoice status. You can also select the number of rows to display on a page from the Rows drop-down. Any combination of filters can be used.
View:
Choose whether to list only Basic Services, Additional Services or Both.
All columns on the grid can be sorted by clicking on the column header. To see details for a specific time or expense entry, click on a row.
Only authorized users can see the financial values. Unauthorized users
can only view the hours.
The Approved and Unapproved status filters are visible only
if the Time/Expense
Slips Require Approval check box is selected.
When the Status filter is set to Unapproved, the list shows Complete
and No Charge time only.
Button Panel
Search  :
:
Use this search field to locate projects quickly. The field's predictive search instantly display results as you type in this field.
Active only:
Mark this check box to search only the active projects.
Previous:
Click to display the previous project record.
Next:
Click to display the next project record.
Help:
Opens the ArchiOffice Help in the Projects section.
Action
New:
Select to create a new project.
Duplicate:
Select to duplicate an active project record.
Delete:
Select to delete a project. This is a secure privilege available only when specifically allowed in the Preferences screen.
My List:
Select to view projects assigned to you.
List
Select to view a list of all projects.
Find:
Use this option to locate projects matching specific criteria, with the resulting Found Set displayed in the List View.
Re-Find:
Select to return to the last Find criteria so you can modify the requests before executing the search.